Hosting Actual with Unraid
This guide assumes you already have the Community Apps (CA) plugin installed and don't yet have Actual-Server installed. If you don't have the CA plugin installed, install it now. Please read through all of the instructions before starting. As always, backup your data by exporting from the web interface prior to making any configuration changes.
The current Actual Unraid CA was defined and maintained by hofq. Problems specifically with the unraid template (not Actual itself) should be addressed to that repo, which can be found here.
Initial setup
-
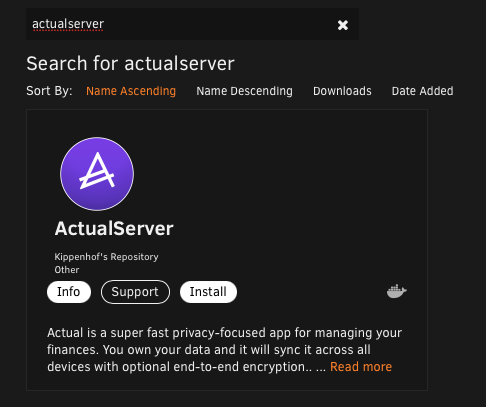
Search for "actualserver" in Community Apps and select the one by Kippenhof (the only one at this time).
-
Click Install.
Setting up data persistence
To avoid losing data when updating your image, you may wish to setup a persistent volume.
-
Towards the bottom the template, select
Add another Path, Variable, Label or Device, -
In the popup, fill in the following details - changing your host location to match your setup:
- Name the path
Data, - Set the Container Path:
/data, - Set the Host Path (eg)
/mnt/user/appdata/actual
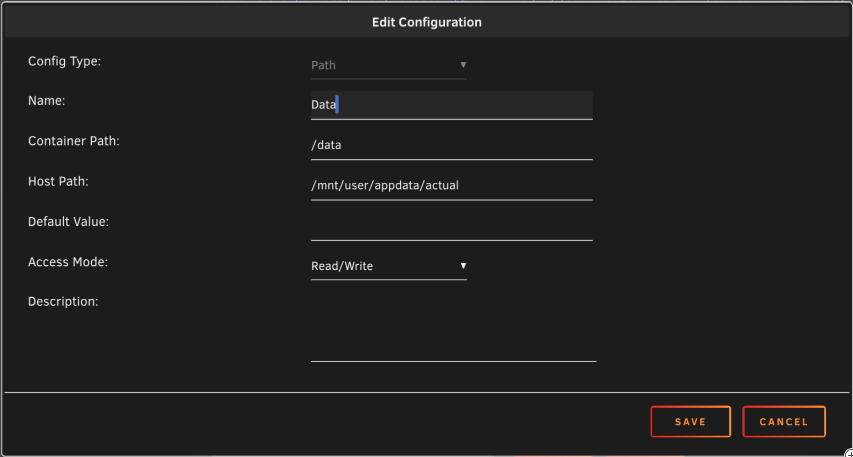
This creates a directory named
actualon your server and maps the container's/datafolder to that directory on your Unraid server. This persists the data to the server. You can then make backups of the database from the host path you specified above. - Name the path
-
Click "Apply", watch the container pull the image and start up. Login to Actual as outlined in the other guides.
(Note: It's generally wise to have a manual backup strategy just in case. Two is one, one is none!)
Changing the image source
If you'd like to point the Actual Community App to a different image, it's simple to do so.
- First, backup your data. Safety first! See the documentation on exporting your data for specific instructions.
- On the settings page for the Actual CA, locate the
repositoryfield.
- Update this value to point to the dockerhub image of your choice. Eg, to use the official image
change this value to
jlongster/actual-server
- Confirm that the correct image is pulled. The
By:section should readBy: jlongster/actual-server(or whichever image source you have chosen to use).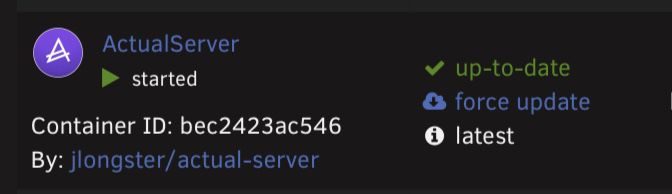
If you already had an alternate image running:
- BACKUP YOUR DATA. Safety first!
- Stop your container and click
edit. - Change the repository field to point to the dockerhub image of your choice. See the above section if needed.
- Click Apply, and watch the container do its magic and swap out the image.
- Restart the container if it didn't restart automatically.
- On the
Dockertab, enableAdvanced Viewand confirm that you are now running the image you entered in step 3. - Try logging in to your budget like normal. You may have to log in again or you may get a sync error that says you need to revert to another version. Once you get through all that, you should be good to go. If it went badly, hopefully you didn't skip step 1!