mirror of
https://github.com/actualbudget/actual.git
synced 2026-08-02 21:56:50 -05:00

74 lines
3.9 KiB
Markdown
74 lines
3.9 KiB
Markdown
---
|
|
title: 'Unraid'
|
|
---
|
|
|
|
## Hosting Actual with [Unraid](https://unraid.net/)
|
|
|
|
This guide assumes you already have the [Community Apps (CA) plugin](https://forums.unraid.net/topic/38582-plug-in-community-applications/)
|
|
installed and don't yet have Actual-Server installed. If you don't have the CA plugin installed,
|
|
install it now. Please read through all of the instructions before starting.
|
|
As always, backup your data by exporting from the web interface prior to making any configuration
|
|
changes.
|
|
|
|
The current Actual Unraid CA was defined and maintained by hofq. Problems specifically with the
|
|
unraid template (not Actual itself) should be addressed to that repo, which can be found [here](https://github.com/hofq/docker-templates/issues/new/choose).
|
|
|
|
## Initial setup
|
|
|
|
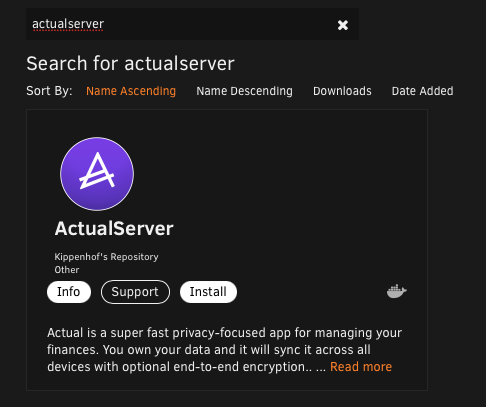
1. Search for "actualserver" in [Community Apps](https://unraid.net/community/apps?q=actualserver) and
|
|
select the one by Kippenhof (the only one at this time).
|
|
1. Click Install.
|
|
|
|
|
|
|
|
## Setting up data persistence
|
|
|
|
To avoid losing data when updating your image, you may wish to setup a persistent volume.
|
|
|
|
1. Towards the bottom the template, select `Add another Path, Variable, Label or Device`,
|
|
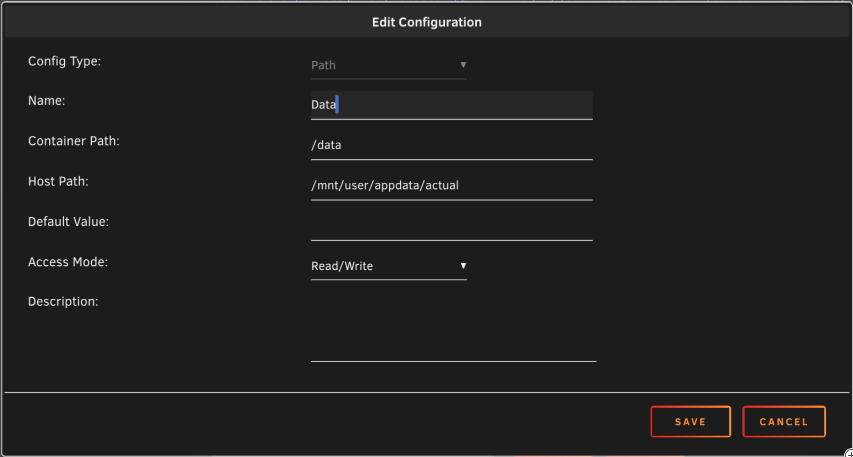
1. In the popup, fill in the following details - changing your host location to match your setup:
|
|
1. Name the path `Data`,
|
|
1. Set the Container Path: `/data`,
|
|
1. Set the Host Path (eg) `/mnt/user/appdata/actual`
|
|
|
|
|
|
|
|
This creates a directory named `actual` on your server and maps the container's `/data` folder to
|
|
that directory on your Unraid server. This persists the data to the server. You can then make
|
|
backups of the database from the host path you specified above.
|
|
|
|
1. Click "Apply", watch the container pull the image and start up. Login to Actual as outlined in
|
|
the other guides.
|
|
|
|
(Note: It's generally wise to have a manual backup strategy just in case. Two is one, one is none!)
|
|
|
|
## Changing the image source
|
|
|
|
If you'd like to point the Actual Community App to a different image, it's simple to do so.
|
|
|
|
1. First, backup your data. Safety first! See the documentation on exporting your data for specific
|
|
instructions.
|
|
1. On the settings page for the Actual CA, locate the `repository` field.
|
|

|
|
1. Update this value to point to the dockerhub image of your choice. Eg, to use the official image
|
|
change this value to [`jlongster/actual-server`](https://hub.docker.com/r/jlongster/actual-server)
|
|

|
|
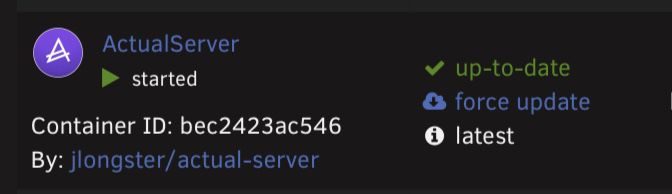
1. Confirm that the correct image is pulled. The `By:` section should read `By:
|
|
jlongster/actual-server` (or whichever image source you have chosen to use).
|
|
|
|
|
|
### If you already had an alternate image running:
|
|
|
|
1. BACKUP YOUR DATA. Safety first!
|
|
1. Stop your container and click `edit`.
|
|
1. Change the repository field to point to the dockerhub image of your choice. See the above section
|
|
if needed.
|
|
1. Click Apply, and watch the container do its magic and swap out the image.
|
|
1. Restart the container if it didn't restart automatically.
|
|
1. On the `Docker` tab, enable `Advanced View` and confirm that you are now running the image you
|
|
entered in step 3.
|
|

|
|
1. Try logging in to your budget like normal. You may have to log in again or you may get a sync
|
|
error that says you need to revert to another version. Once you get through all that, you should be
|
|
good to go. If it went badly, hopefully you didn't skip step 1!
|